In general, reasonable jumper management can be divided into five phases: planning, preparation, wiring, testing, and verification.
1 jumper operation specification
1.1 plan
Pre-establishment, no pre-emptive, and doing everything in advance requires detailed planning in advance. For jumper management, you should plan your current and future needs.
(1.1.1) Change request. Various management activities, moves, additions, or changes (MACs) begin with a change request. The change request must contain all the necessary information to start the planning process.
(1.1.2) Search records. After receiving the request form, the record should be searched to determine the circuit path used.
(1.1.3) Correct routing. Before determining the correct jumper length, first, find the best route between the ports to be connected. It is usually the shortest path through the horizontal and vertical cable conduits and must not obstruct or obstruct other jumpers or connectors in the patch panel. Select jumpers, avoid excessive slack and ensure a neat appearance. Too tight a jumper will increase the tension on the connector, and excessive slack will cause trouble for jumper management and increase the management difficulty of the patch panel.
1.2 Preparation
After making the plan for jumper management, you should follow the plan prepared in advance, and then you should prepare for the jumper management. Prepare as much as possible before conducting management operations to study management records. Determine the location of the port that needs to be connected and reconnected and the label information of the relevant port.
(1.2.1) First, check the model that requires the jumper, and then check the quality of the jumper. In order to ensure that the quality of the jumper is correct, it is necessary to check whether the jumper is damaged. In order to check whether it is damaged, you can first check it from the appearance of the jumper. If you have the condition, you can check it with a professional instrument.
(1.2.2) Next, check the condition of the joint to avoid physical damage to the joint.
(1.2.3) Finally, it is necessary to clean the jumper connector and the connection part.
There are two methods for cleaning the fiber optic connector: contact and non-contact:
Contact cleaning method:
(1) Wiping paper and anhydrous alcohol, using original wood pulp with special processing technology, ultra-low dust, pure texture, high-efficiency water absorption, fine paper, will not scratch the surface of the inserted object, use low dust wipe paper with no Water alcohol wipes the fiber optic connector;
(2) Non-woven fabric, no lint, strong, no chemical impurities, silky soft, does not cause allergic reactions and is not easy to fluff and hair loss, is produced or tested as a fiber optic connector or pin Ideal for cleaning wipes, wipe the fiber optic connector with anhydrous alcohol during use.
(3) Cleaning cotton swabs, specially designed for internal cleaning of ceramic bushings, or for cleaning ferrule end faces that are not easily accessible in flanges (or adapters);
(4) Professional cleaners, special cleaners for fiber optic connectors use a special role of wiping tape, which can be installed in a rollable casing without alcohol. Each cleaning is very effective and produces a new surface, which is convenient and practical.
Non-contact method:
(1) Ultrasonic cleaning method, which turns the cleaning liquid into an ultrasonic “liquid column” and sends it to the end face of the connector, and recovers and absorbs the waste liquid in the same small space;
(2) High-pressure blowing method, the principle is that the cleaning liquid is first applied to the end face of the connector, and then the high-pressure gas is used to align the end face of the connector;
(1.2.4) Check the cleaning of the fiber connector
After cleaning the fiber optic connector, the termination faces must be inspected. The general practice is to use a magnifying glass of 100, 200 or 400 times. The figure below shows the state of the fiber termination surface in a clean state and after being contaminated.
Jumper managers, no matter what method is used, are difficult to clean for some heavily contaminated connectors and need to be treated with a cleaning solution such as cotton swabs and alcohol.
After this series of preparations, it means that the wiring work of the jumper management can be carried out.
1.3 wiring
The installation of the distribution frame shall be completed at various stages in accordance with the operating procedures. Kink knots, burrs, pinches, and poor contact in jumper construction can significantly reduce jumper performance. To avoid such problems, the following factors should be considered:
(1) Bending radius
The minimum bend radius allowed for the jumper is subject to the jumper manufacturer’s specifications.
The standard stipulates that the minimum bend radius of unshielded twisted pair (UTP) should be four times the diameter of the cable, and the shielded twisted pair is eight times the diameter of the cable. The minimum bend radius of a 2-core or 4-core horizontal cable is greater than 25 mm. If the bend radius is less than this standard, the relative position of the wire may be changed, resulting in a decrease in transmission performance.
(2) Jumper stretching and stress
During the wiring process, do not use excessive force, otherwise, the stress on the jumper and the connector may be increased, resulting in performance degradation.
(3) Bundling
Jumpers do not necessarily need to be bundled. If the strapping needs to comply with the manufacturer’s strapping principle, do not bundle too tightly, otherwise, it will cause the twisted pair to be deformed. Do not overtighten the clamps. It is advisable to rotate the jumpers freely. Use a dedicated product and consider a product that can be used repeatedly without tools, such as a Velcro tape.
1.4 test
(1) Although it has been completed by jumper wiring, it may not be considered whether the fiber link or copper link fully complies with the operating specifications or the international standard of the integrated wiring, then the fiber or copper cable test should be carried out. After the test standard is met, it can be determined whether the test standard has passed.
1.5 verification
(1) It is worthwhile to spend some time on the final visual inspection of the connection. Make sure that the jumper is not kinked and is not caught by the cabinet door.
(2) The last step is to update the record according to the current configuration and close the work order related to the changed request that has been executed.
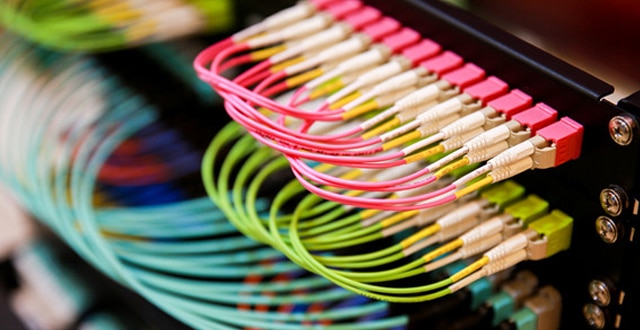
Jumpers are now an important part of the cabling system, especially for the good management of jumpers in data center projects. It is believed that as long as the construction management personnel correctly and reasonably jumper management operations, the entire integrated wiring will become a truly advanced, scientific, practical, and reliable system.
Disclaimer: All information indicated as other sources is transferred from other platforms, the purpose is to convey more information, does not represent the views and positions of this site. Please contact us if there is any infringement or objection.